Cabinet Painting Sacramento offers homeowners the opportunity to rejuvenate their cabinets and create a fresh aesthetic that aligns with their style preferences. In addition, refreshed cabinets can increase home value and appeal to potential buyers.
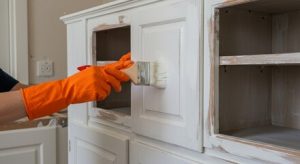
To ensure a quality finish, professionals sand cabinets to provide a smooth surface for primer and paint. They also use a mildew-resistant primer that prevents moisture from causing future problems.
Primer
A primer is basically the glue layer that connects your paint to your cabinet doors. It’s formulated to be very “sticky,” so it adheres well, providing a superior base for the top coat. It also covers blemishes and imperfections that would otherwise show through the finished product. It’s important to use the right primer for your cabinet painting project. The wrong one can cause your paint to flake or not last as long as it should.
To avoid wasting time and money, you should apply a good quality primer before you start your actual painting project. There are several types to choose from, so you can get exactly what you need for your project. For example, if your cabinets are stained, you will want to choose a stain blocker primer. This will hide the stains and ensure that your new paint won’t flake or peel.
If your cabinets aren’t stained, you can use a standard bonding primer to help them hold up to the wear and tear of daily life. This will help them look great for a longer period of time, and it will protect the integrity of your cabinet frame.
When choosing a primer, you should always read the label and follow the manufacturer’s instructions. Some primers need to dry for a certain amount of time before you can paint over them, especially enamel. So it’s important to plan accordingly and make sure that you have enough space for your project.
Another thing to consider is the type of paint that you will be using on your cabinets. Some primers contain a high level of VOC (Volatile Organic Compound) and can be harmful to your health and the environment. To avoid this, you should choose a low VOC primer, like Sherwin-Williams Fresh Start or Benjamin Moore Advance.
Both of these primers are low in VOC, have a quick drying time and will provide you with a smooth, professional-looking finish for your kitchen cabinets. They also spray, brush and roll easily so that you can complete your project quickly and easily.
Preparation
Professional cabinet painting is an affordable way to elevate the ambiance and aesthetics of a home. But a successful finish depends on thorough surface preparation. Rushing or skipping steps like cleaning, sanding, and priming can significantly impact the outcome of a paint job, causing it to chip or peel prematurely.
Using quality materials like primer and paint formulated specifically for cabinet surfaces also contributes to a smooth, durable result. In addition, ensuring adequate ventilation during surface prep is key to prevent inhalation of fumes from chemicals or cleaners.
A good primer acts as a bridge between the cabinet surface and the new coat of paint, enhancing adhesion and preventing uneven absorption. It also protects the underlying material from moisture and contaminants, which can cause long-term damage. Primer is especially critical if you’re changing the color of your cabinets, as it helps block the old hue completely and ensures that the new shade shines through.
The cabinet painting process begins with thorough cleaning to remove dirt and grease buildup. A degreaser is then applied to cut through kitchen grime, preparing the surface for paint. Next, a light sanding with a handheld or Festool power sander is performed to smooth out the surface. Afterward, all areas are wiped down with a damp cloth to remove dust and debris.
If there are any dents, scratches, or holes in the cabinet surface, they can be filled with wood filler or putty, and then sanded again until flush with the surrounding surface. Once the sanding and cleaning are complete, your cabinets will be ready for priming.
Once the cabinets have been cleaned and sanded, it’s important to let them dry completely before applying primer. A high-quality primer, such as KILZ 3(r) PREMIUM Primer, is used because it provides superior adhesion and creates a barrier that helps prevent future damage from moisture and contaminants. The primer also contains mildew-resistant properties, which are vital in a kitchen.
Using a high-quality roller and brush, a smooth primer is then applied to the cabinet surfaces. A 6” roller is typically used for the large flat areas, while an angled sash brush is utilized to reach corners and edges. Once the primer has dried, it’s re-sanded to smooth out any rough spots and to prepare for the final paint application.
Paint
Cabinet painting is one of the most important steps in a kitchen transformation. Proper cleaning, sanding, and priming ensure that the final coating will hold up to frequent use and resist chipping and staining. It’s also important to apply the paint in a way that will give you a smooth, professional finish. A poorly executed job can result in a messy, uneven finish. Avoiding common mistakes can save you time, money, and headaches.
Skipping sanding: This can lead to poor paint adhesion and create an uneven surface. Not labeling parts: This can make re-assembly confusing and frustrating. Applying thick coats: This can cause drips and uneven finishes. Not allowing enough dry time: This can result in premature peeling and fading. Choosing the wrong paint: Not all wall paints are created equal. Choose a durable, high-performance cabinet or enamel product to resist moisture and staining.
A fresh coat of paint can shift your daily habits: You’ll notice your kitchen more, feel like cooking in it, and are more likely to try new recipes or techniques. Painting cabinets can also increase resale value and allow you to switch out hardware for an inexpensive upgrade.
While exact figures vary, painting typically costs a fraction of the cost of replacement, saving on materials and labor. A full replacement often requires demolition, new electrical or plumbing, and expensive drywall repairs. In addition, replacing your cabinets can reveal hidden costs for additional work such as wood repair or structural changes. A skilled cabinet painter can often avoid these surprises. The right products can give you a modern, stylish look that matches your home’s style and current trends. A wide range of aesthetic choices and finishes, from classic white to deep blues, let you customize your kitchen to suit your personal taste. Many of our clients tell us that their refreshed kitchens feel inviting and comfortable. If you’re ready for a cabinet refresh, contact us for a free estimate. We’ll come to your home and discuss color options, provide a detailed estimate, and answer any questions you might have.
Finish
Using high-quality cabinet paint is key for a beautiful finish. Look for an alkyd or enamel-based paint that dries harder than regular wall paint and resists moisture to keep cabinets looking new. Apply thin coats with a brush or sprayer and allow to dry completely between each application. Depending on the color and finish chosen, two to three coats will give your kitchen a fresh new look.
When finished, reassemble your cabinets. Remove any hardware and place back in its proper spot (you’ll have a list thanks to the labels), wipe down surfaces, and enjoy your kitchen’s new look! Be patient, as it may take up to a week for the new finish to fully cure.
Cabinet painting or refacing can provide a big aesthetic boost at a fraction of the cost of full replacement. Bold colors can make small rooms feel larger, while satin or semi-gloss finishes clean easier and reflect light to brighten dark areas. Professionals follow specific steps for surface prep, priming, and coating to balance durability, appearance, and turnaround time.
A painted cabinet project requires more preparation than a stained one, including sanding for proper adhesion. Getting this step wrong leads to poor finish quality and premature peeling. Skipping it altogether results in bare wood or worse, a mess. To avoid these pitfalls, sand in the direction of the grain, and start with coarse-grit sandpaper before progressing to finer grits.
Finally, always use a paint made specifically for cabinets. Regular wall paint won’t stand up to the daily wear and tear of a busy kitchen, so choose a cabinet-grade product that dries hard and resists moisture for a long-lasting finish. It’s also a good idea to choose a satin or semi-gloss finish for a sleek, polished look that’s easy to wipe down and clean.
Painting cabinets can be a DIY project, but it’s important to understand the work involved. A professional like Frederick Painting can save you time, and provides a higher-quality sprayed finish and workmanship warranty for added peace of mind. Get itemized quotes for your scope of work and compare prep, product brands, and warranties to find the best value.Cabinet painting offers homeowners the opportunity to rejuvenate their cabinets and create a fresh aesthetic that aligns with style preferences. In addition, refreshed cabinets can increase home value and appeal to potential buyers.
To ensure a quality finish, professionals sand cabinets to provide a smooth surface for primer and paint. They also use a mildew-resistant primer that prevents moisture from causing future problems.
Primer
A primer is basically the glue layer that connects your paint to your cabinet doors. It’s formulated to be very “sticky” so it adheres well, providing a superior base for the top coat. It also covers blemishes and imperfections that would otherwise show through the finished product. It’s important to use the right primer for your cabinet painting project. The wrong one can cause your paint to flake or not last as long as it should.
To avoid wasting time and money, you should apply a good quality primer before you start your actual painting project. There are several types to choose from, so you can get exactly what you need for your project. For example, if your cabinets are stained, you will want to choose a stain blocker primer. This will hide the stains and ensure that your new paint won’t flake or peel.
If your cabinets aren’t stained, you can use a standard bonding primer to help them hold up to the wear and tear of daily life. This will help them look great for a longer period of time, and it will protect the integrity of your cabinet frame.
When choosing a primer, you should always read the label and follow the manufacturer’s instructions. Some primers need to dry for a certain amount of time before you can paint over them, especially enamel. So it’s important to plan accordingly and make sure that you have enough space for your project.
Another thing to consider is the type of paint that you will be using on your cabinets. Some primers contain a high level of VOC (Volatile Organic Compound) and can be harmful to your health and the environment. To avoid this, you should choose a low VOC primer, like Sherwin-Williams Fresh Start or Benjamin Moore Advance.
Both of these primers are low in VOC, have a quick drying time and will provide you with a smooth, professional-looking finish for your kitchen cabinets. They also spray, brush and roll easily so that you can complete your project quickly and easily.
Preparation
Professional cabinet painting is an affordable way to elevate the ambiance and aesthetics of a home. But a successful finish depends on thorough surface preparation. Rushing or skipping steps like cleaning, sanding, and priming can significantly impact the outcome of a paint job, causing it to chip or peel prematurely.
Using quality materials like primer and paint formulated specifically for cabinet surfaces also contributes to a smooth, durable result. In addition, ensuring adequate ventilation during surface prep is key to preventing inhalation of fumes from chemicals or cleaners.
A good primer acts as a bridge between the cabinet surface and the new coat of paint, enhancing adhesion and preventing uneven absorption. It also protects the underlying material from moisture and contaminants, which can cause long-term damage. Primer is especially critical if you’re changing the color of your cabinets, as it helps block the old hue completely and ensures that the new shade shines through.
The cabinet painting process begins with thorough cleaning to remove dirt and grease buildup. A degreaser is then applied to cut through kitchen grime, preparing the surface for paint. Next, a light sanding with a handheld or Festool power sander is performed to smooth out the surface. Afterward, all areas are wiped down with a damp cloth to remove dust and debris.
If there are any dents, scratches, or holes in the cabinet surface, they can be filled with wood filler or putty, and then sanded again until flush with the surrounding surface. Once the sanding and cleaning are complete, your cabinets will be ready for priming.
Once the cabinets have been cleaned and sanded, it’s important to let them dry completely before applying primer. A high-quality primer, such as KILZ 3(r) PREMIUM Primer, is used because it provides superior adhesion and creates a barrier that helps prevent future damage from moisture and contaminants. The primer also contains mildew-resistant properties, which are vital in a kitchen.
Using a high-quality roller and brush, a smooth primer is then applied to the cabinet surfaces. A 6” roller is typically used for the large flat areas, while an angled sash brush is utilized to reach corners and edges. Once the primer has dried, it’s re-sanded to smooth out any rough spots and to prepare for the final paint application.
Paint
Cabinet painting is one of the most important steps in a kitchen transformation. Proper cleaning, sanding, and priming ensure that the final coating will hold up to frequent use and resist chipping and staining. It’s also important to apply the paint in a way that will give you a smooth, professional finish. A poorly executed job can result in a messy, uneven finish. Avoiding common mistakes can save you time, money, and headaches.
Skipping sanding: This can lead to poor paint adhesion and create an uneven surface. Not labeling parts: This can make re-assembly confusing and frustrating. Applying thick coats: This can cause drips and uneven finishes. Not allowing enough dry time: This can result in premature peeling and fading. Choosing the wrong paint: Not all wall paints are created equal. Choose a durable, high-performance cabinet or enamel product to resist moisture and staining.
A fresh coat of paint can shift your daily habits: You’ll notice your kitchen more, feel like cooking in it, and are more likely to try new recipes or techniques. Painting cabinets can also increase resale value and allow you to switch out hardware for an inexpensive upgrade.
While exact figures vary, painting typically costs a fraction of the cost of replacement, saving on materials and labor. A full replacement often requires demolition, new electrical or plumbing, and expensive drywall repairs. In addition, replacing your cabinets can reveal hidden costs for additional work such as wood repair or structural changes. A skilled cabinet painter can often avoid these surprises. The right products can give you a modern, stylish look that matches your home’s style and current trends. A wide range of aesthetic choices and finishes, from classic white to deep blues, lets you customize your kitchen to suit your personal taste. Many of our clients tell us that their refreshed kitchens feel inviting and comfortable. If you’re ready for a cabinet refresh, contact us for a free estimate. We’ll come to your home and discuss color options, provide a detailed estimate, and answer any questions you might have.
Finish
Using high-quality cabinet paint is key for a beautiful finish. Look for an alkyd or enamel-based paint that dries harder than regular wall paint and resists moisture to keep cabinets looking new. Apply thin coats with a brush or sprayer and allow to dry completely between each application. Depending on the color and finish chosen, two to three coats will give your kitchen a fresh new look.
When finished, reassemble your cabinets. Remove any hardware and place it back in its proper spot (you’ll have a list thanks to the labels), wipe down surfaces, and enjoy your kitchen’s new look! Be patient, as it may take up to a week for the new finish to fully cure.
Cabinet painting or refacing can provide a big aesthetic boost at a fraction of the cost of full replacement. Bold colors can make small rooms feel larger, while satin or semi-gloss finishes clean easier and reflect light to brighten dark areas. Professionals follow specific steps for surface prep, priming, and coating to balance durability, appearance, and turnaround time.
A painted cabinet project requires more preparation than a stained one, including sanding for proper adhesion. Getting this step wrong leads to poor finish quality and premature peeling. Skipping it altogether results in bare wood or worse, a mess. To avoid these pitfalls, sand in the direction of the grain, and start with coarse-grit sandpaper before progressing to finer grits.
Finally, always use a paint made specifically for cabinets. Regular wall paint won’t stand up to the daily wear and tear of a busy kitchen, so choose a cabinet-grade product that dries hard and resists moisture for a long-lasting finish. It’s also a good idea to choose a satin or semi-gloss finish for a sleek, polished look that’s easy to wipe down and clean.
Painting cabinets can be a DIY project, but it’s important to understand the work involved. A professional like Frederick Painting can save you time and provide a higher-quality sprayed finish and workmanship warranty for added peace of mind. Get itemized quotes for your scope of work and compare prep, product brands, and warranties to find the best value.